
In order to properly configure LiteSpeed for WordPress, you must first enable the Redis server. The process of setting it up is very simple, we described it in our blog post: https://www.smarthost.au/blog/how-to-activate-redis-on-smarthost-server
The first step we already know, the next step is to install the LiteSpeed Cache plugin. To do this, go to the WordPress admin panel, go to Plugins -> Add New. On the right side we have a search engine in which we type a keyword, for example, “cache”. We install as well as activate the plugin.
Once installed and activated, the plug-in will appear for us in the menu on the left. We navigate to it. We click the “Cache” options and pass to the “Object” tab. A window will open for us to configure our plug-in. We select “Method” as “Redis”. We fill in the window “Port” and “Password” according to the data we received after enabling the redis server on our account.
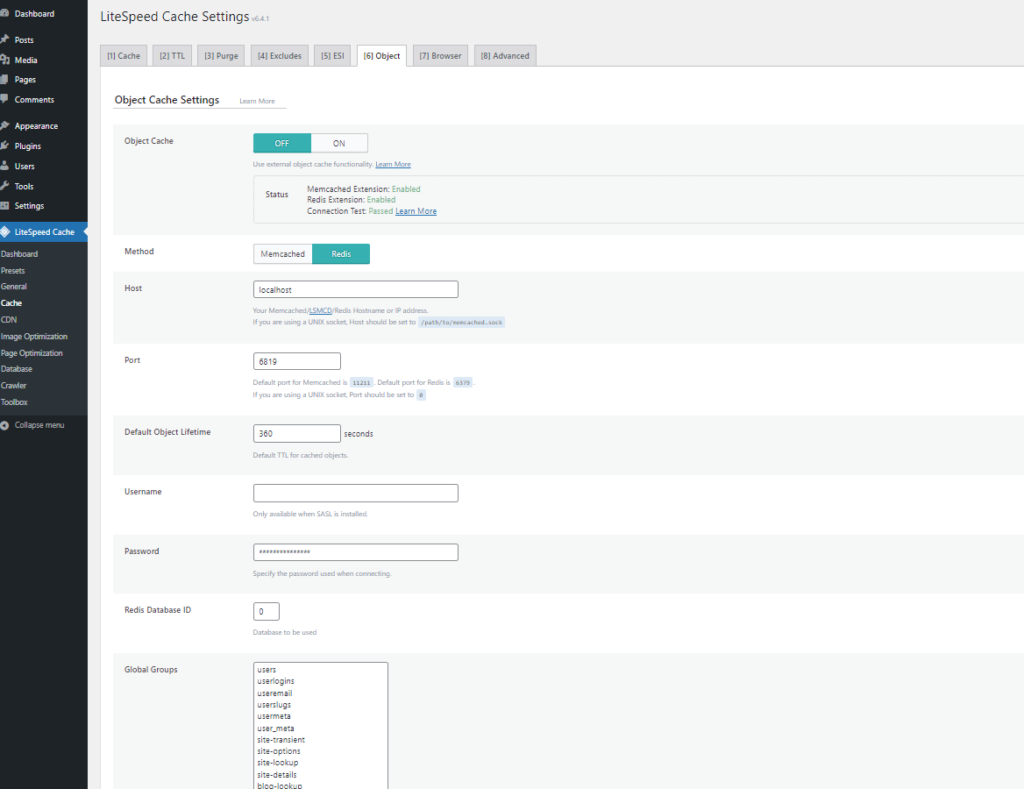
The object cache can be enabled or disabled.
If you enable this option, the data retrieved by the application from the database will be cached in the application so that it will not be repeatedly downloaded .
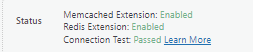
Now our plugin is properly configured. In the “Status” section we have information about its current state of operation:
- How to additionally secure WordPress and Joomla sign-in? - October 20, 2022
- LiteSpeed configuration for WordPress - October 20, 2022